Adding content links to your email signature is a quick and easy way to promote blog posts. While setting up a custom email signature through your email provider is easy enough, updating that content on a regular basis can be a chore. Luckily, Chrome plugin WiseStamp offers an automated solution.
To set up your dynamic email signature, download the free version and follow the steps below.
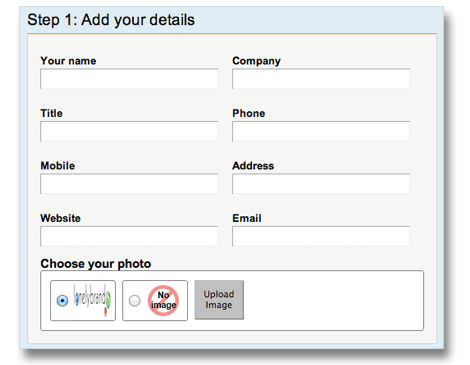
Step 1: Add your details
First off, add any basic info you would like to include in your email signature. You can also throw in a company logo at this point in the process.
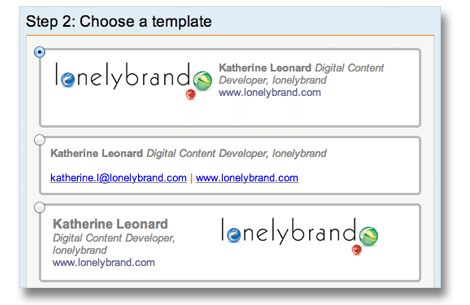
Step 2: Choose a template
WiseStamp offers several basic layouts for your email signature. If the setup isn’t perfect, don’t worry – you can go in and edit for styling later.
Step 3: Add bells & whistles
Next you can tweak your signature’s formatting and add applications. WiseStamp offers a wide range of apps, but I recommend sticking to the more practical options:
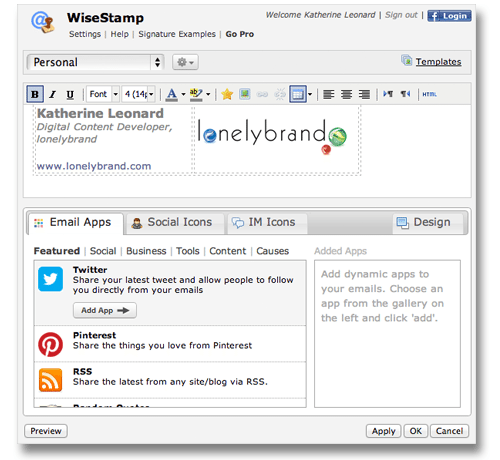
- RSS
- Google Plus
- Etsy Shop
- WordPress
Final Product
The next time you write an email, the WiseStamp logo should show up at the bottom of your dialogue box. Hit this button, and your signature will automatically show up from now on below the body of all composed emails. Be sure to disable your pre-existing email signature so that you don’t double up.
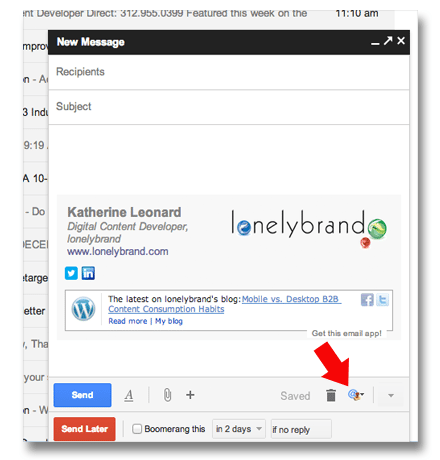
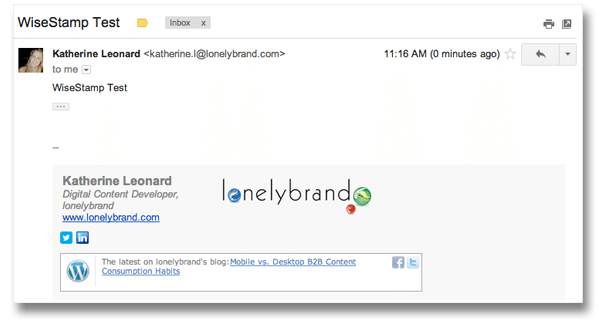
The final product looks something like this, and should always include the most recent item published on your blog.
Have a tool you think we should cover in for our digital marketing toolbox series? Comment below or shoot me an email at katherine.l@lonelybrand.com.
