Thanks to the large, easy-to-find icons, the apps bar on Facebook Timeline is a terrific way for brands to call attention to marketing materials. Last week we showed you how to add Instagram to your Facebook Timeline – a great approach for giving visitors a taste of your company culture through sepia-toned filters. This week we’ll take you through the steps to add MailChimp to your page so that fans can sign up for your brand’s newsletter right on Facebook.
1. Log in to MailChimp
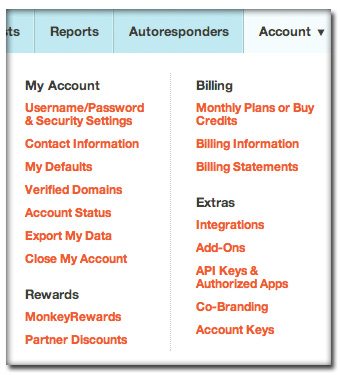
Once you’ve logged in, hover over Account in the menu bar and select Extras > Integrations.
2. Connect MailChimp to Facebook
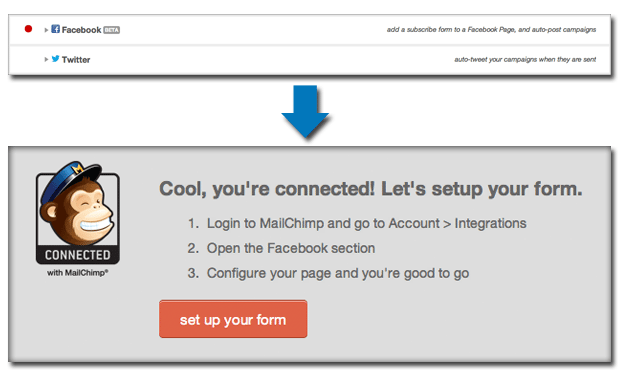
Facebook should be the first item listed in the Integrations Directory. Click Connect and you’ll be redirected to Facebook, where you’ll go through the typical permission dialogue boxes.
3. Choose your list
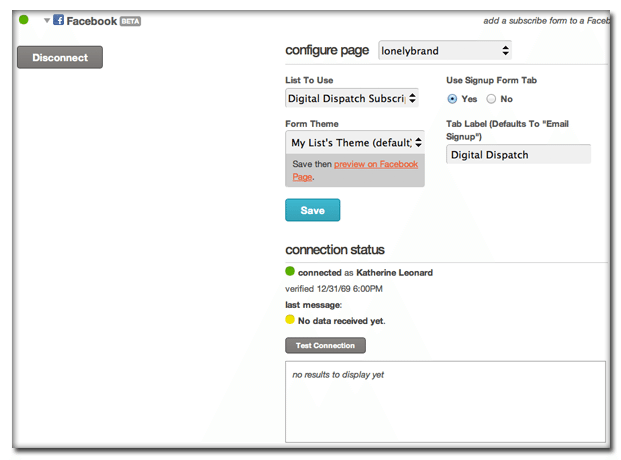
Once you’ve connected the account to Facebook, head back to the Integrations page in MailChimp and select the List you want to use (or create a new list, if you’d rather). Be sure to select Yes under Use Signup Form Tab.
4. Build your form
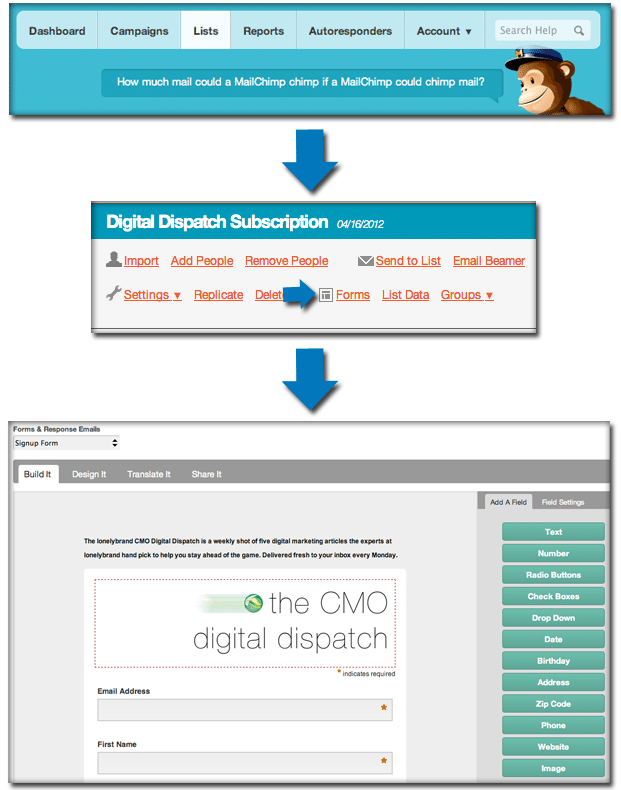
Click the Lists tab on the main menu then select the Forms button under the list you want. Building forms is actually pretty easy thanks to the intuitive MailChimp interface. Remember to insert an enticing description for your newsletter at the top, as well as an attention-grabbing graphic. Now choose the fields you want to collect in the form. When deciding how many fields to include, be sure to strike a balance between the information you need and a quick and easy user experience. The preview window will show you what your final product looks like.
5. Clean up the experience from Facebook Pages Manager
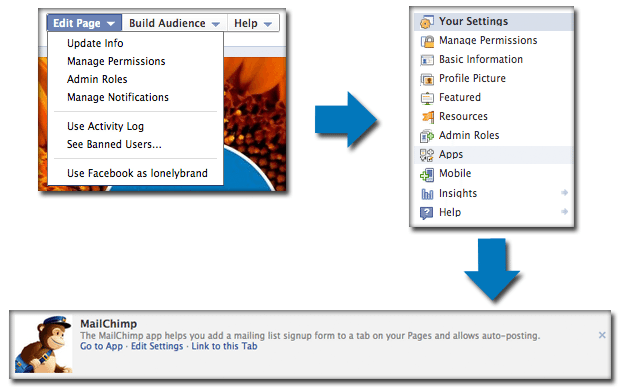
Now head back to your Facebook page and access the apps menu by clicking Edit Page > Manage Permissions. Select Apps on the menu to the left, and find MailChimp within your master list of apps. Select Edit Settings to change the name of the app as it shows up on your Facebook page (this could be the name of your newsletter, for example). Also change the app icon here if you want something other than the standard rainbow MailChimp envelope.
6. Final Product: MailChimp App on Facebook
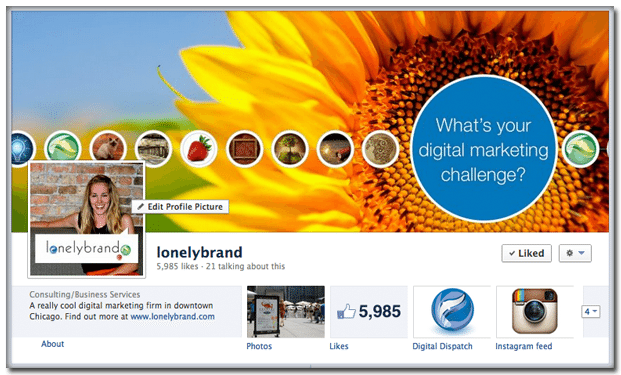
The final product will look something like the example below. Be sure to rearrange your app icons so that the MailChimp app is one of the four visible apps – you don’t want to make Facebook fans dig for your newsletter signup.
Which apps do you have on your brand’s Facebook Timeline? Be sure to check out our step-by-step guide to adding Instagram to Facebook pages.
lonelybrand’s CMO Digital Dispatch is a weekly shot of five digital marketing articles the experts at lonelybrand hand pick to help you stay ahead of the game. Delivered fresh to your inbox every Monday. Sign up (and check out our MailChimp form on Facebook) here!
