Over on our post about adding an Instagram tab to a Facebook brand page, we’ve fielded several questions about sharing Instagram photos directly to a brand Timeline. There are lots of benefits to this technique, especially if you are looking to get those trendy restaurant photos some better distribution. So here it is: a step-by-step guide to sharing sepia-toned photos on your company’s Facebook wall.
Step 1: Head to the options page in Instagram
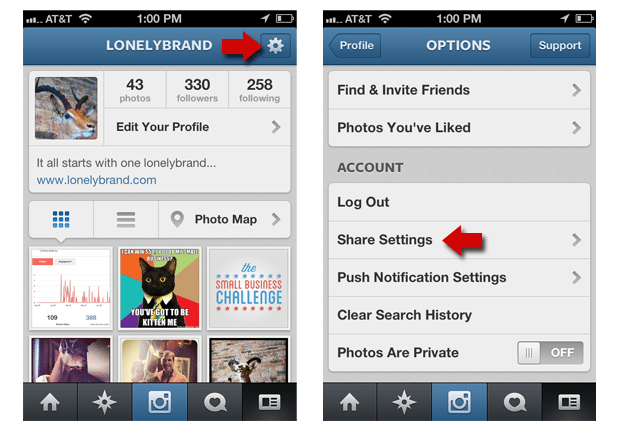
To access the options page, tap the wheel in the upper righthand corner of your profile page. Next you’ll need to select Share Settings.

Step 2: Connect Instagram to Facebook
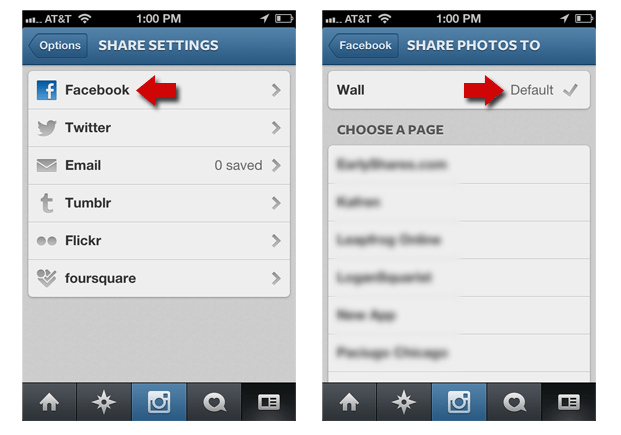
Over on the Share Settings page, the first option is Facebook. Tap this option. If your device isn’t already connected to Facebook, you’ll be prompted to log in. Be sure to use the personal account that is attached to your brand page. Once connected, the default Facebook share setting sends images to your personal wall. To change this, tap the “Wall … Default” box.

Step 3: Give Instagram access to your Facebook page
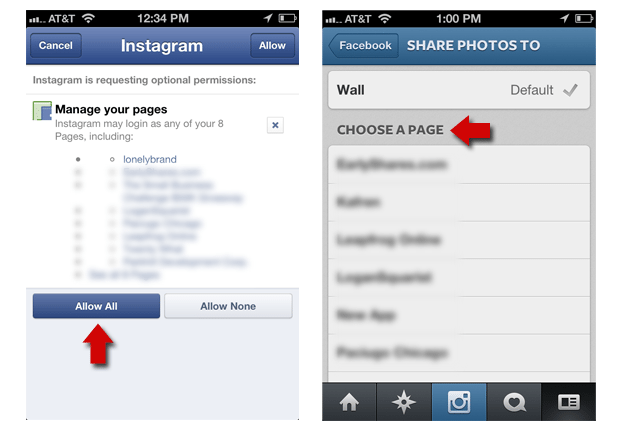
Again, you’ll be redirected to Facebook. This time you’ll need to give Instagram permission to access your Facebook page(s), so hit the “Allow All” button. Once you’re back in Instagram, tap the page you want to post photos to, and a corresponding checkmark should appear.

Step 4: Share your photo on Facebook
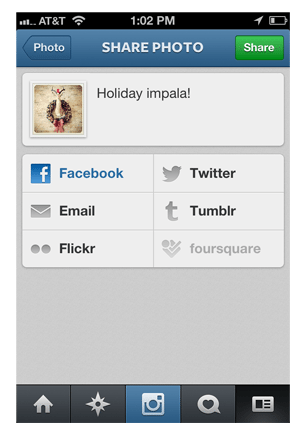
Now that Instagram is connected to your Facebook page, you’re ready to share. Follow the normal preparations (cropping, filtering, etc.), and continue on to the Share Photo screen. Under the caption box, you’ll see the available sharing options. Tap Facebook, and the image will be posted on your company Timeline.

Step 5: Final product
Your Instagram should show up on your Timeline and in followers’ news feeds (although the actual number it’s seen by hinges on EdgeRank algorithms). The image will also be automatically stored in a Facebook album entitled “Instagram Photos.” To give Instagram a permanent home on your page, check out this tutorial on adding an Instagram tab to Facebook.

